

If you are in worried situation that you have lost your data by accidental deletion or format of drive or lost partition then don’t worry..!!! EaseUS free data recovery software is a correct solution to your problem. In this article we bring to our readers steps involved in using this free data recovery software.
Start the Program and Scan
First of all, please download the program and install it on your computer. Care must be taken that user do not install it on the disk where he or she has lost his or her data, otherwise those lost files and data will be overwritten.
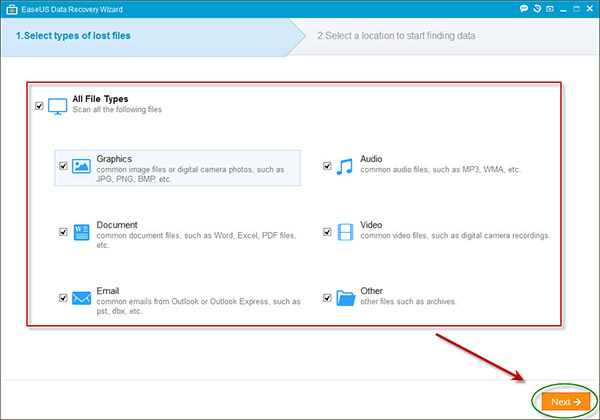
Select Types of Lost Data
When starting this program, first to be taken care is the file type select page. All the common file formats are classified into 6 different categories in this page, including Graphic, Audio, Document, Video, Email and Other. All the categories are checked in default. To choose only the specific types of the files you want to retrieve will sharply accelerate the scan speed.

Select a Location to Start Finding Data
Please select a location to start finding data, like Desktop, Windows Libraries, Hard Disk Drives, Lost Hard Disk Drives (This option is suitable for the situation of a data loss caused by deleting a partition, losing a partition or re-partition. Our program will read the partition table and list all the deleted partition info under it.)
Scan Your Computer or Device
In the upper part of the program is the process bar displaying the status of the recovery? Next to the bar there are a Stop and Pause button. The Pause button allows you to temporarily pause the scan and resume it later. Under the process bar is the estimated remaining time and by clicking Deep Scan at the left bottom, our program will perform a new sector by sector scan, which will take longer than the first scan. Please be patient and do not interrupt it in the middle of the process if not necessary.
Preview and Recover the Files
The window at the right side displays a thumbnail and info for the file selected in the middle window. It provides a Preview option to preview some specific file types in the program.
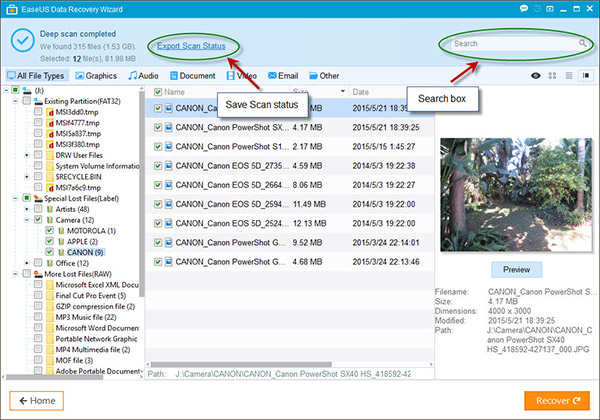
After the preview or search, you can select the targeted files and press Recover button to recover and save them on your computer or storage device (Please DO NOT save the files into the drive or device where you lost the data).
Moreover, you can export the scan results by clicking Export Scan Status, and you can Import the scan results to perform another recovery without scanning again at any time by clicking Import Scan Status.